利用 Google Sheets 當資料庫,透過 AppScript 建立 API,讓 Cloudflare Workers 當你的轉址小精靈!
為什麼我需要這個酷東東?
- 不想跟別人用一樣的短網址(例如:reurl、bitly…)
- 想要有自己的短網址(cool.page/home 之類的不是超酷嗎?)
注意:免費版 Cloudflare Workers 有 100,000 請求 / 天 的限制,如果會超過這個用量請自行付費升級,但如果是個人或小公司應該是夠用的~
預期流程
- 在 Google Sheets 填入短碼及原始網址(以短碼 gh,原始網址為
https://github.com/為例) - 訪問
https://go.example.com/gh→ 跳轉到 GitHub
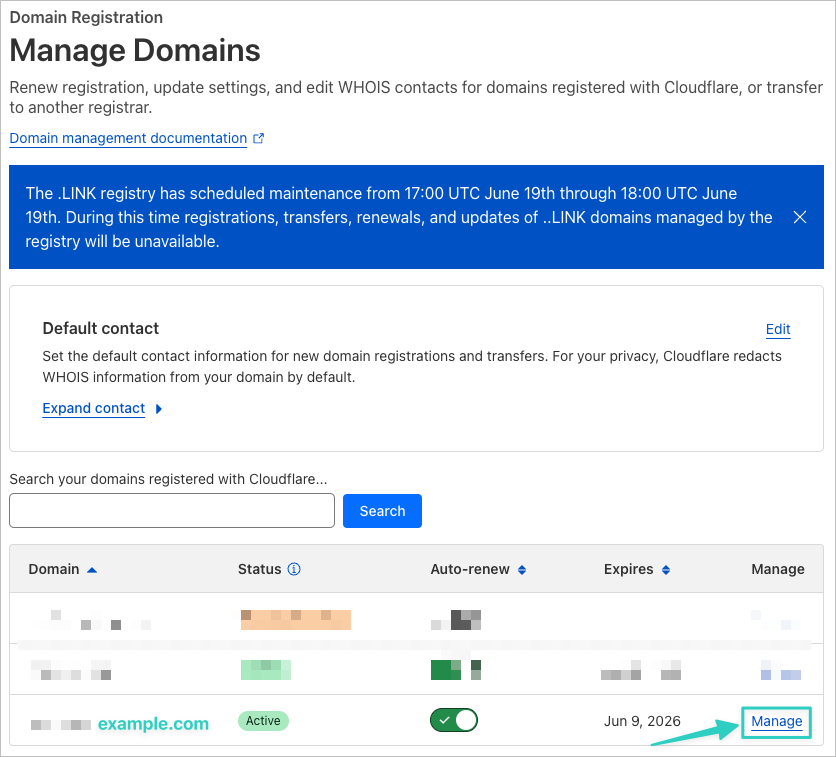
第 0 步:準備一個網域
- 由於本教學會使用 Cloudflare Workers,建議一起在 Cloudflare 購買網域,之後設定 DNS 會比較方便,而且 Cloudflare 年費公道,也沒有那些奇奇怪怪的行銷花招。
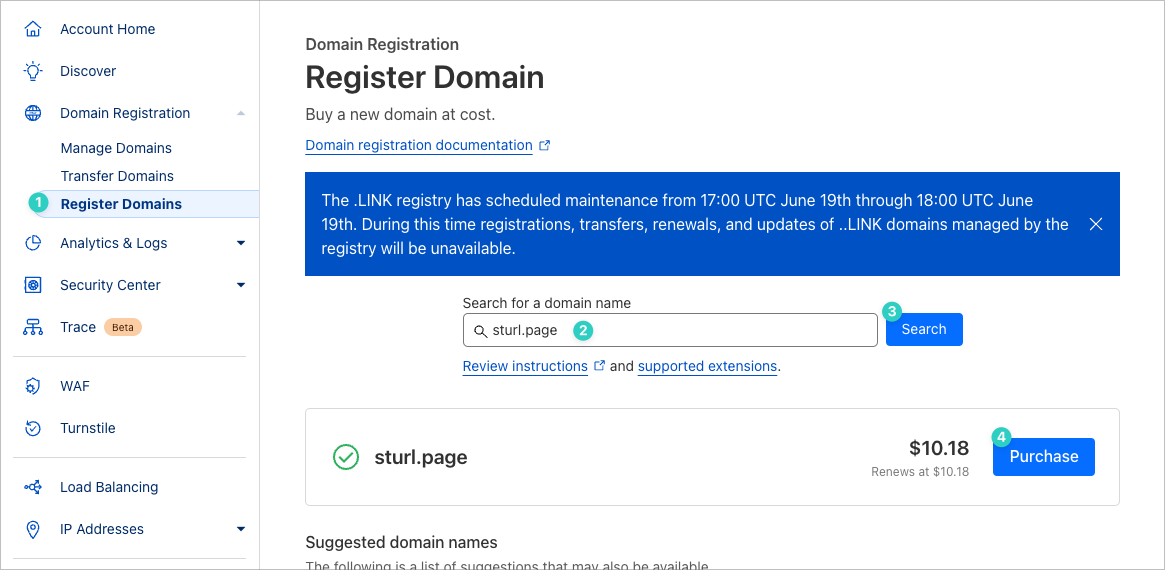
- 點擊「Register Domains」
- 輸入想要購買的網域(建議越短越好,不然就不叫短網址了)
- 按下搜尋
- 買一個符合自己需求、預算的網域
- 接下來的文章以 example.com 當作示範網域
第 1 步:建立 Google Sheets
- 開一個 Google Sheets
- 參考下方格式製作表格,左邊放短碼,右邊放原始網址:
| shortcode | target_url |
|---|---|
| gh | https://github.com |
以 example.com/gpt 為例,shortcode(短碼)就是 「gpt」第 2 步:建立 JSON API(Google Apps Script)
- 在 Google Sheets 點選「擴充功能 → Apps Script」
- 將預設程式碼取代為以下程式碼:
function doGet() {
  const sheet = SpreadsheetApp.getActiveSpreadsheet().getSheetByName("工作表1"); // 請改為你的工作表名稱
  const data = sheet.getDataRange().getValues();

  const result = {};
  for (let i = 1; i < data.length; i++) {
    const shortcode = data[i][0];
    const targetUrl = data[i][1];
    if (shortcode && targetUrl) {
      result[shortcode] = targetUrl;
    }
  }

  return ContentService
    .createTextOutput(JSON.stringify(result))
    .setMimeType(ContentService.MimeType.JSON);
}
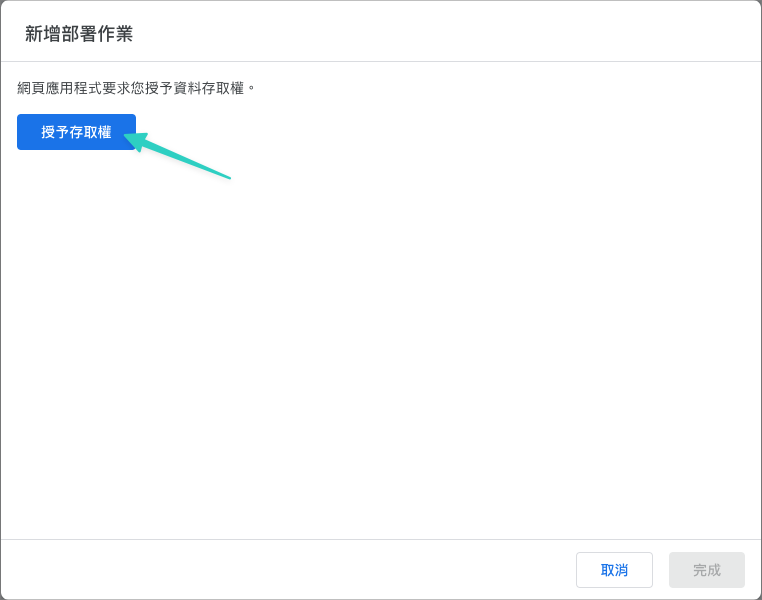
- 點選「部署 → 新增部署作業」
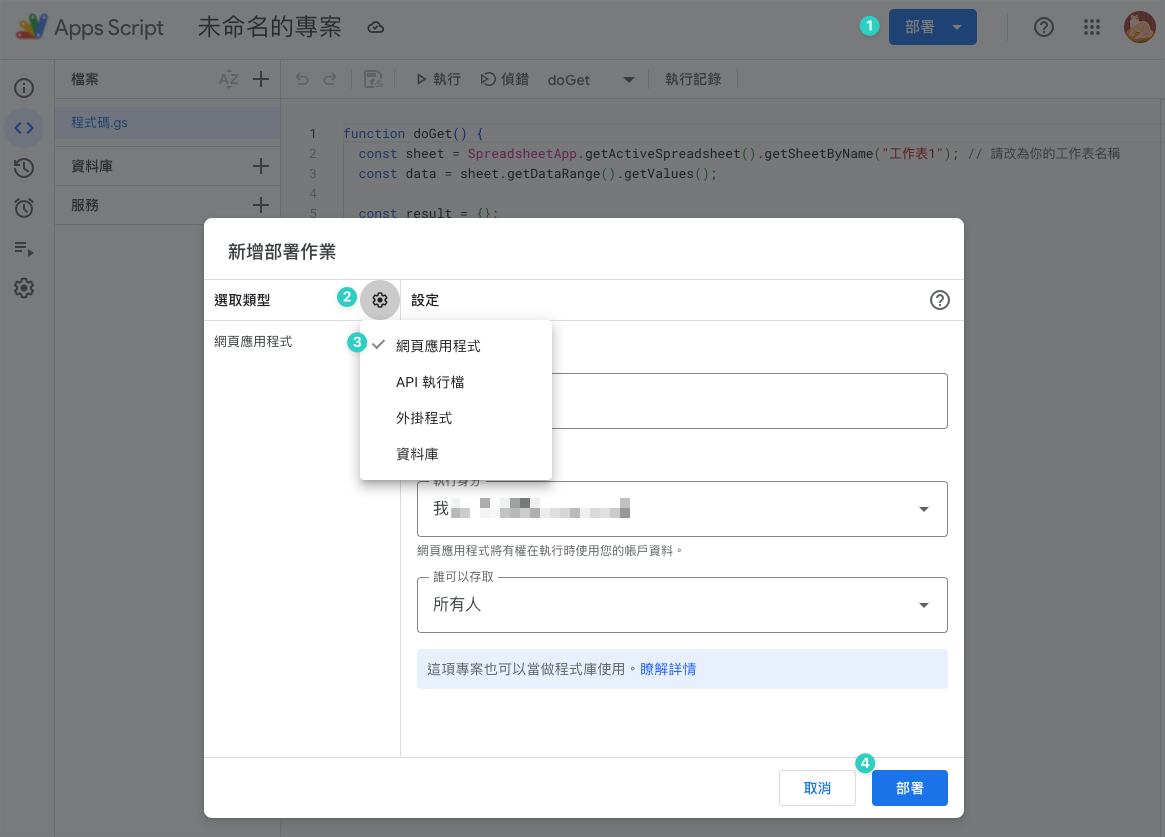
- 選取類型:網頁應用程式
- 執行身份:我
- 誰可以存取:所有人
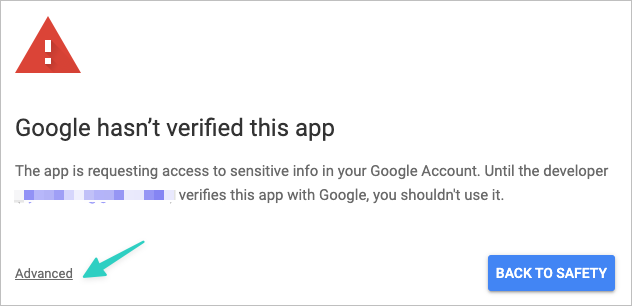
第一次部署會需要授予存取權,雖然看起來有點可怕,但勇敢地按 Allow 就對了


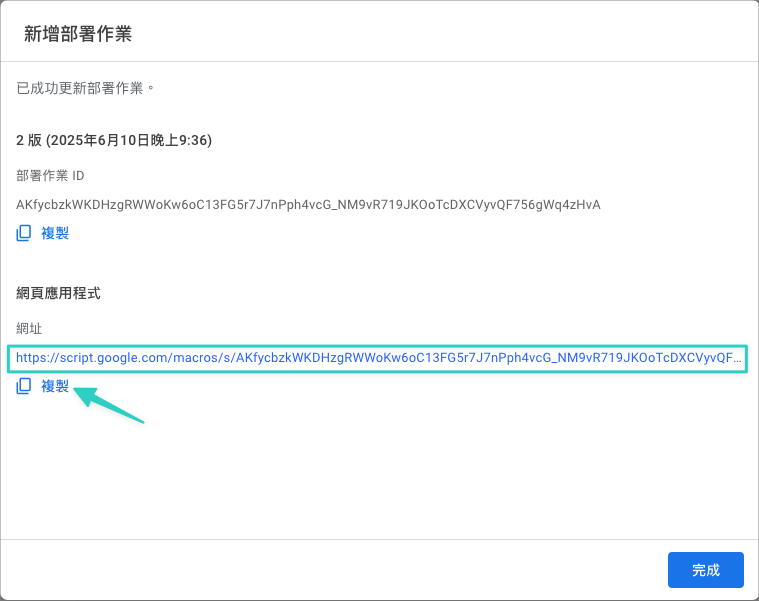
- 部署完成後會拿到一個網址,例如:
https://script.google.com/macros/s/AKfycbxxxxxxxxxxxxxxxxxxxxxx/exec
記下來!後面 Workers 會用到
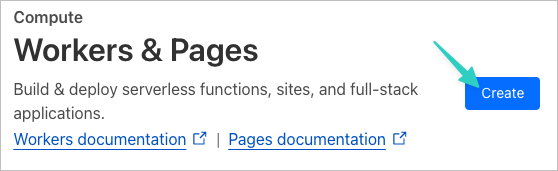
第 3 步:建立 Cloudflare Worker
- 前往 https://workers.cloudflare.com → 登入
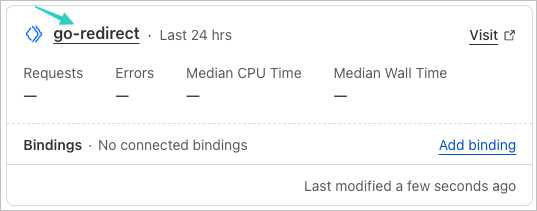
- 建立一個新 Worker,名稱例如
go-redirect
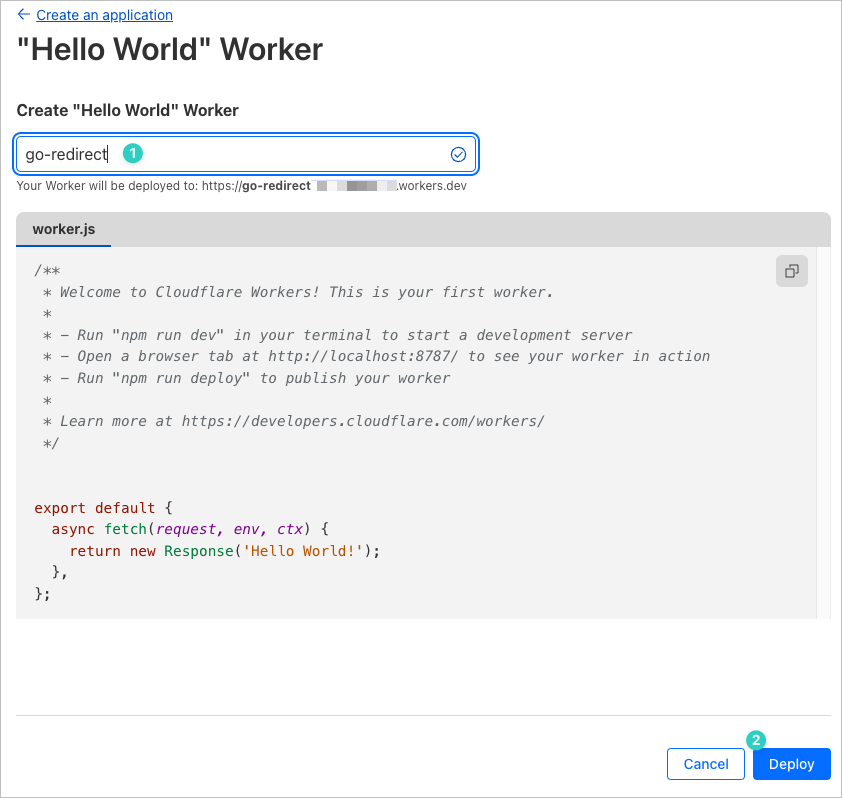
- 將 worker.js 內的預設程式碼替換為下方程式碼

//API_URL 換成剛剛在 AppScript 拿到的網址
const API_URL = "https://script.google.com/macros/s/AKfycbxxxxxxxxxxxxxxxxxxxxxx/exec";

export default {
  async fetch(request, env, ctx) {
    const url = new URL(request.url);
    const shortcode = url.pathname.slice(1);

    const cache = caches.default;
    const cacheKey = new Request(API_URL, { method: 'GET' });

    try {
      // 嘗試從快取讀取
      let response = await cache.match(cacheKey);

      if (!response) {
        // 沒有快取 → 抓 JSON
        response = await fetch(API_URL, {
          headers: { "Cache-Control": "no-cache" },
        });

        if (response.ok) {
          const copy = response.clone();
          ctx.waitUntil(cache.put(cacheKey, copy)); // 非同步寫入快取
        } else {
          return new Response("無法取得資料", { status: 502 });
        }
      }

      const redirects = await response.json();

      if (redirects[shortcode]) {
        return Response.redirect(redirects[shortcode], 302);
      } else {
        return new Response("短碼不存在", { status: 404 });
      }
    } catch (e) {
      return new Response("錯誤:" + e.message, { status: 500 });
    }
  }
}
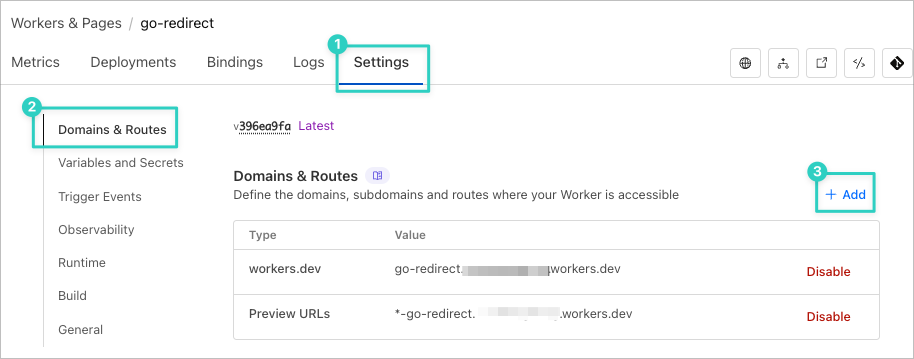
- 部署 workers:點「Deploy」,記住
https://go-redirect.<your Subdomain name>.workers.dev,之後會用到
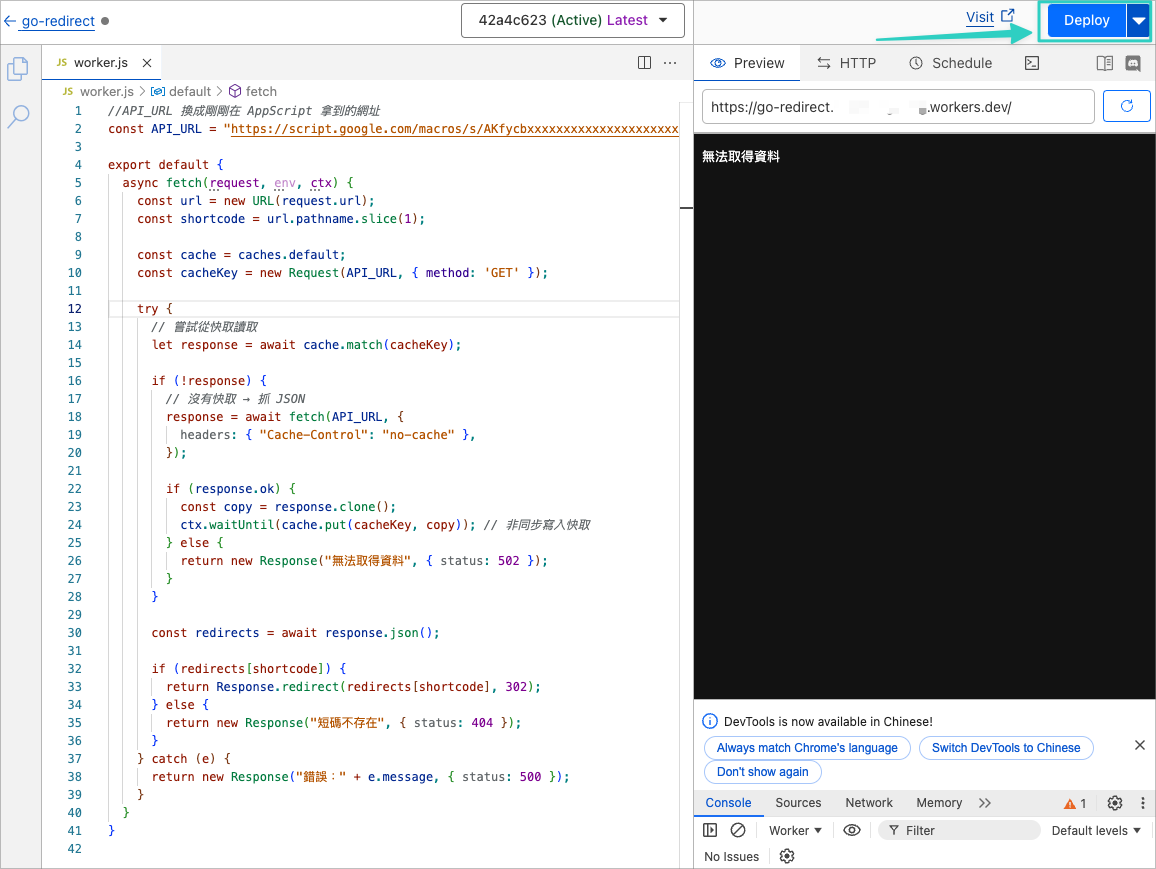
5. 測試:進入 https://go-redirect.<your Subdomain name>.workers.dev/gh ,應該會跳轉到 https://github.com/,
第 4 步:綁定自訂網域
- 到你的 Cloudflare 帳戶 → 選取對應的網域(例如 example.com)
- 在 DNS 新增一筆:

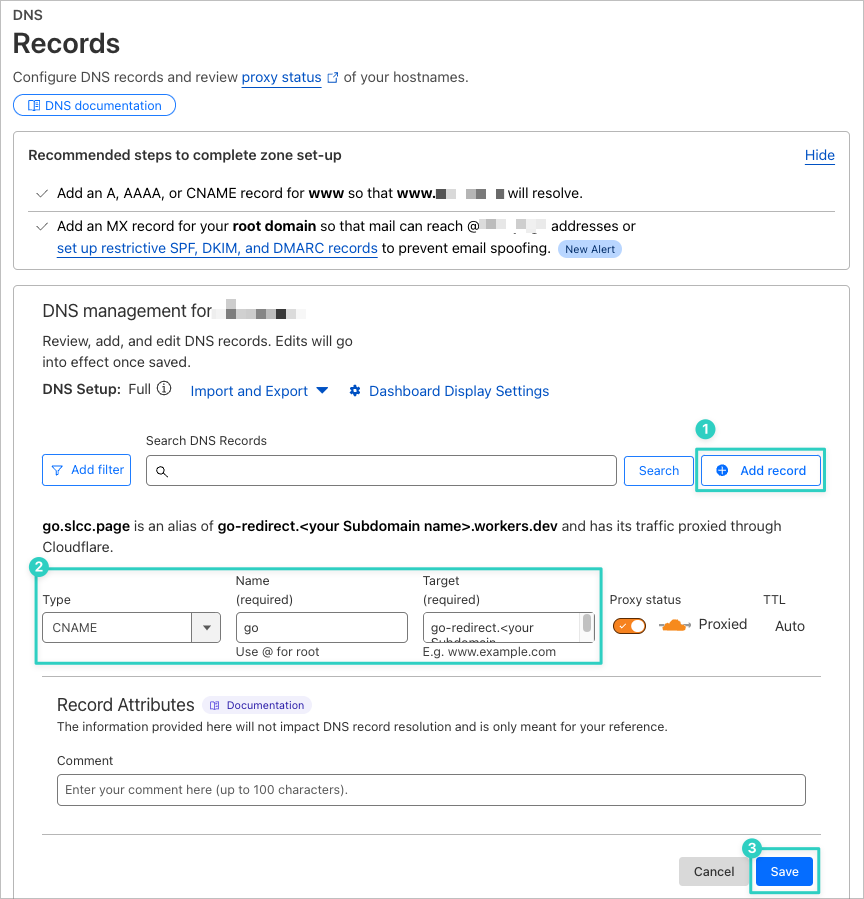
// 想要未來的短網址長 go.example.com/shortcode 就這樣設定
類型:CNAME
名稱:go
目標:你的 Worker 子網域(例如 go-redirect.<your Subdomain name>.workers.dev)

// 想要未來的短網址長 example.com/shortcode 就這樣設定
類型:CNAME
名稱:@
目標:你的 Worker 子網域(例如 go-redirect.<your Subdomain name>.workers.dev)
- 然後在 Workers → Routes 中設定:

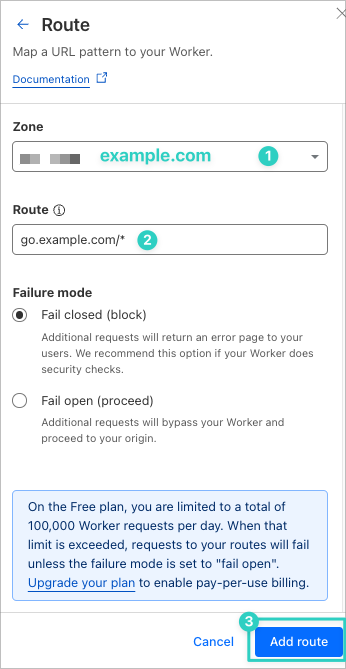
// 想要未來的短網址長 go.example.com/shortcode 就這樣設定
區域:example.com
路由:go.example.com/*

// 想要未來的短網址長 example.com/shortcode 就這樣設定
區域:example.com
路由:example.com/*
第 5 步:大功告成!
現在,當你訪問 https://<你的短網址>/gh ,應該會跳轉到 GitHub,快去試試看吧!